
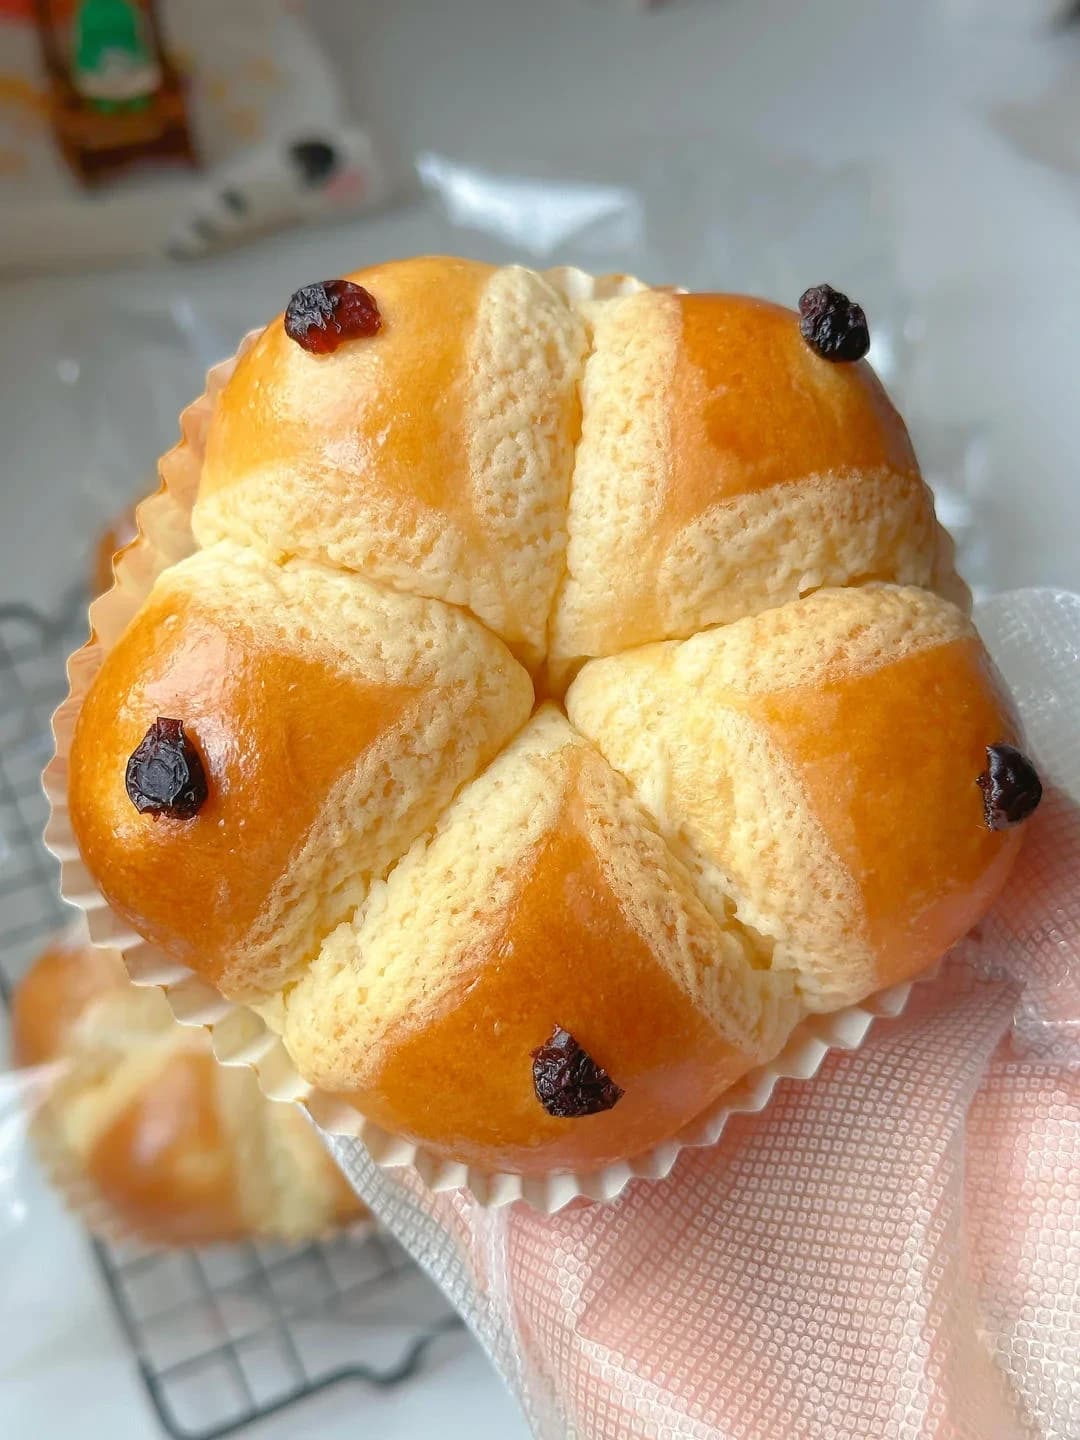
Snow Velvet Flower Bread
雪芙花朵面包 · pan chinese cuisine
Snow Velvet Flower Bread is a medium recipe from the self-published legacy Chopzen collection, catalogued as bakery, bread.
 Chef ChopzenChopzen project content lead. Curating and testing every published recipe for US home cooks.
Key failure points
- If Dough turns greasy and slick and never develops gluten: Hold the butter until the dough forms a thick film, then add softened butter in small batches and knead until fully absorbed
- If Dough barely rises after 1 hour at 28°C: Use fresh yeast, verify the proofing temperature with a thermometer, and extend the time until the dough truly doubles
- If Buns in the same mold bake to different sizes and doneness: Use a kitchen scale to divide the dough into equal 16g pieces before rounding
Nutrition & allergens
No supported allergens detected from surveyed ingredients.
Some ingredients are not yet allergen-surveyed; this label is not exhaustive.
Per serving (6 servings)
- Energy (kcal)
- 425.1
- Protein (g)
- Unknown
- Fat (g)
- 26.9
- Carbs (g)
- 39.9
- Sodium (mg)
- Unknown
Estimated from verified ingredient data for the original formula — not lab values, and one dish is not a full meal.
bread flour高筋面粉
5.88 oz
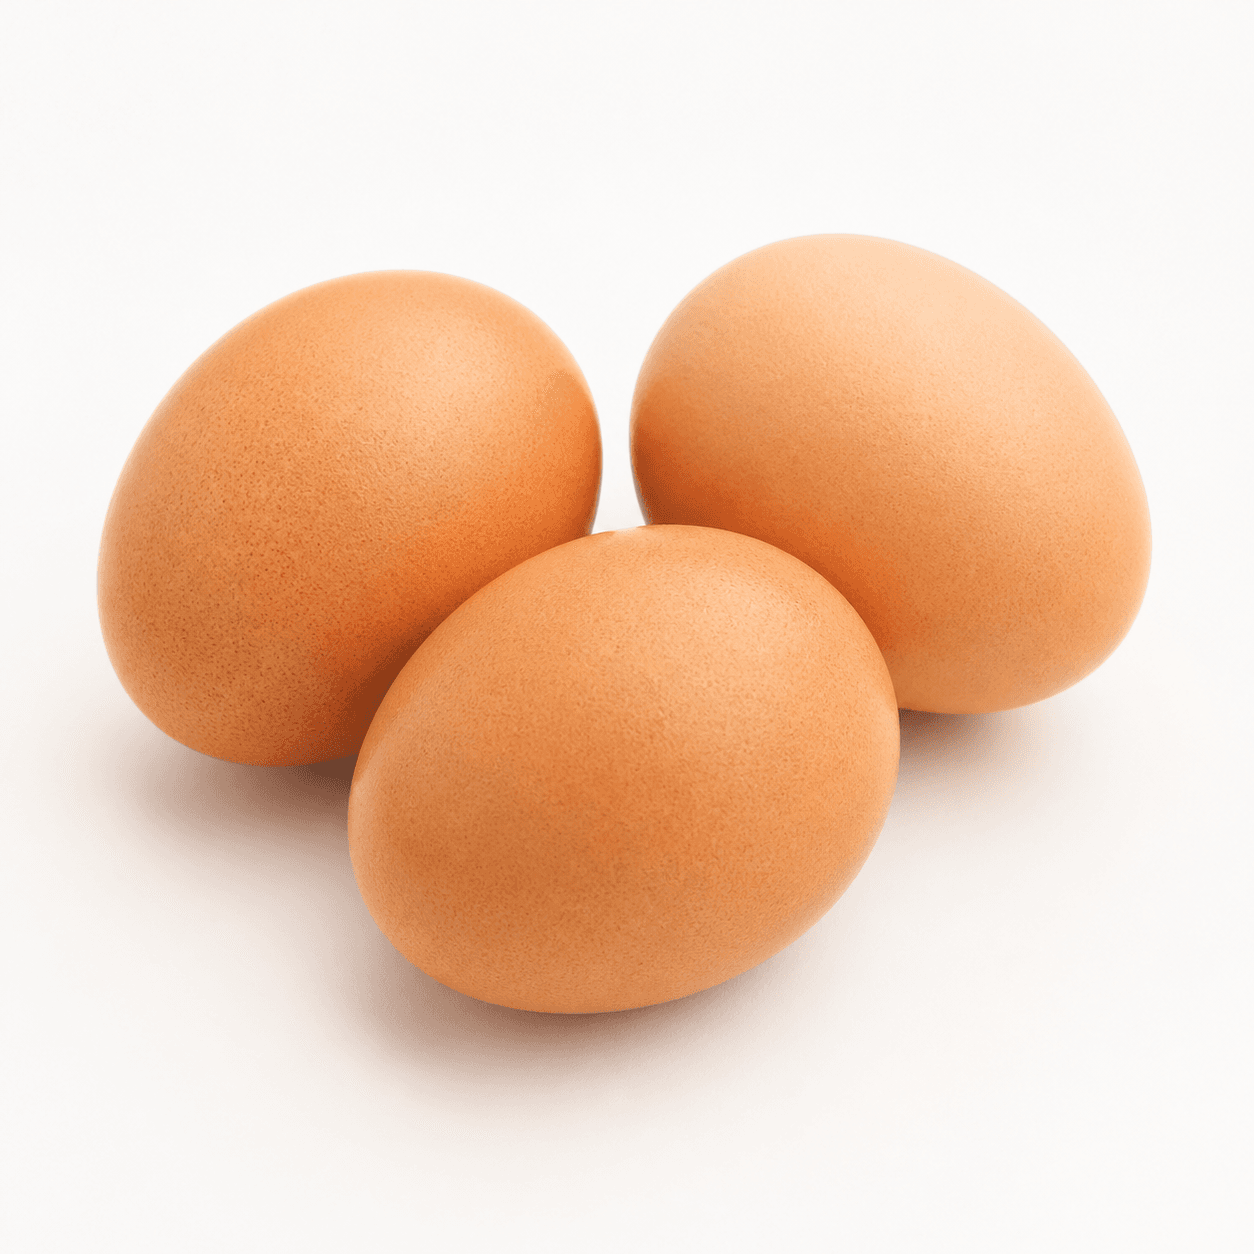
egg鸡蛋
0.67 piece
0.71 oz
salt盐
0.05 oz
cold milk冰牛奶
3.17 oz
yeast酵母
0.07 oz
butter黄油
0.59 oz
snow velvet paste: butter雪芙酱 黄油
0.47 oz
0.24 oz
cake flour低筋面粉
0.53 oz
milk牛奶
0.47 oz
Steps
- 1
Step 1
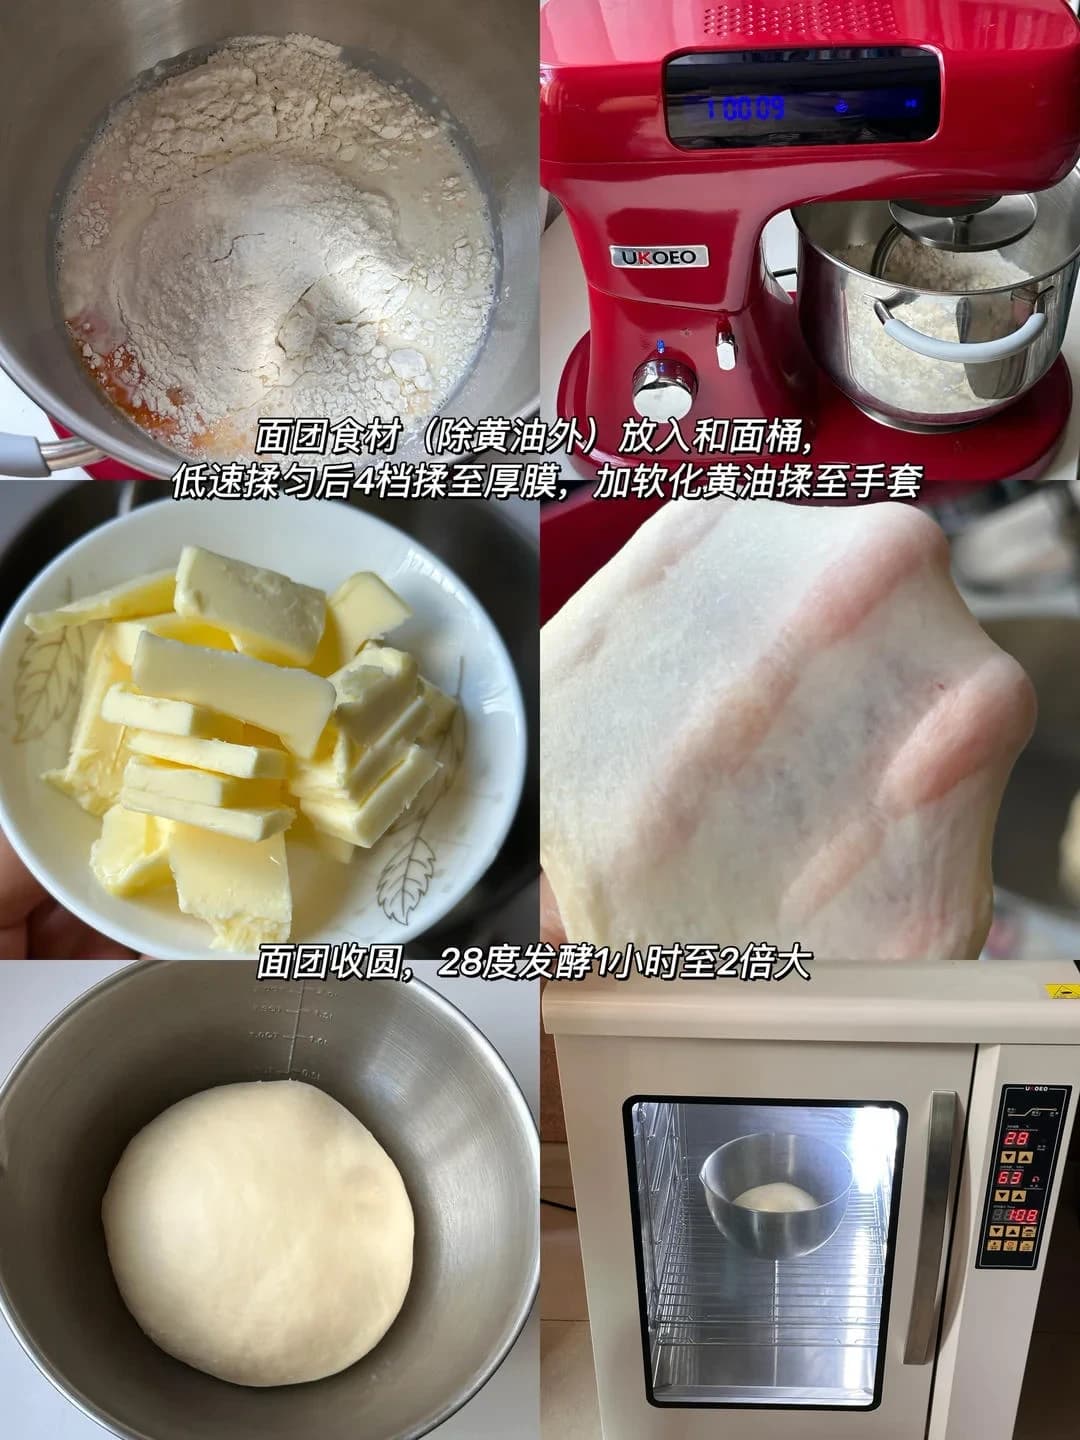
Place all main dough ingredients except butter into the mixing bowl. Mix on low speed until combined, then switch to speed 4 and knead until a thick film forms. Add softened butter and continue kneading until the dough passes the windowpane test. Shape into a round, and proof at 28°C for 1 hour until doubled in size.
✅ Done when: Place all main dough ingredients except butter into the mixing bowl. Mix on low speed until combined, then swi. Finished: Heat the pan or oil to about 180 C before adding the mixture; the surface should sizzle gently on contact.
Watch out: Don't add the butter at the start — it coats the flour and blocks gluten development. Wait until a thick film forms, then add softened (not melted) butter in batches.
If Dough turns greasy and slick and never develops gluten:
Hold the butter until the dough forms a thick film, then add softened butter in small batches and knead until fully absorbed
If Dough barely rises after 1 hour at 28°C:
Use fresh yeast, verify the proofing temperature with a thermometer, and extend the time until the dough truly doubles
- 2
Step 2
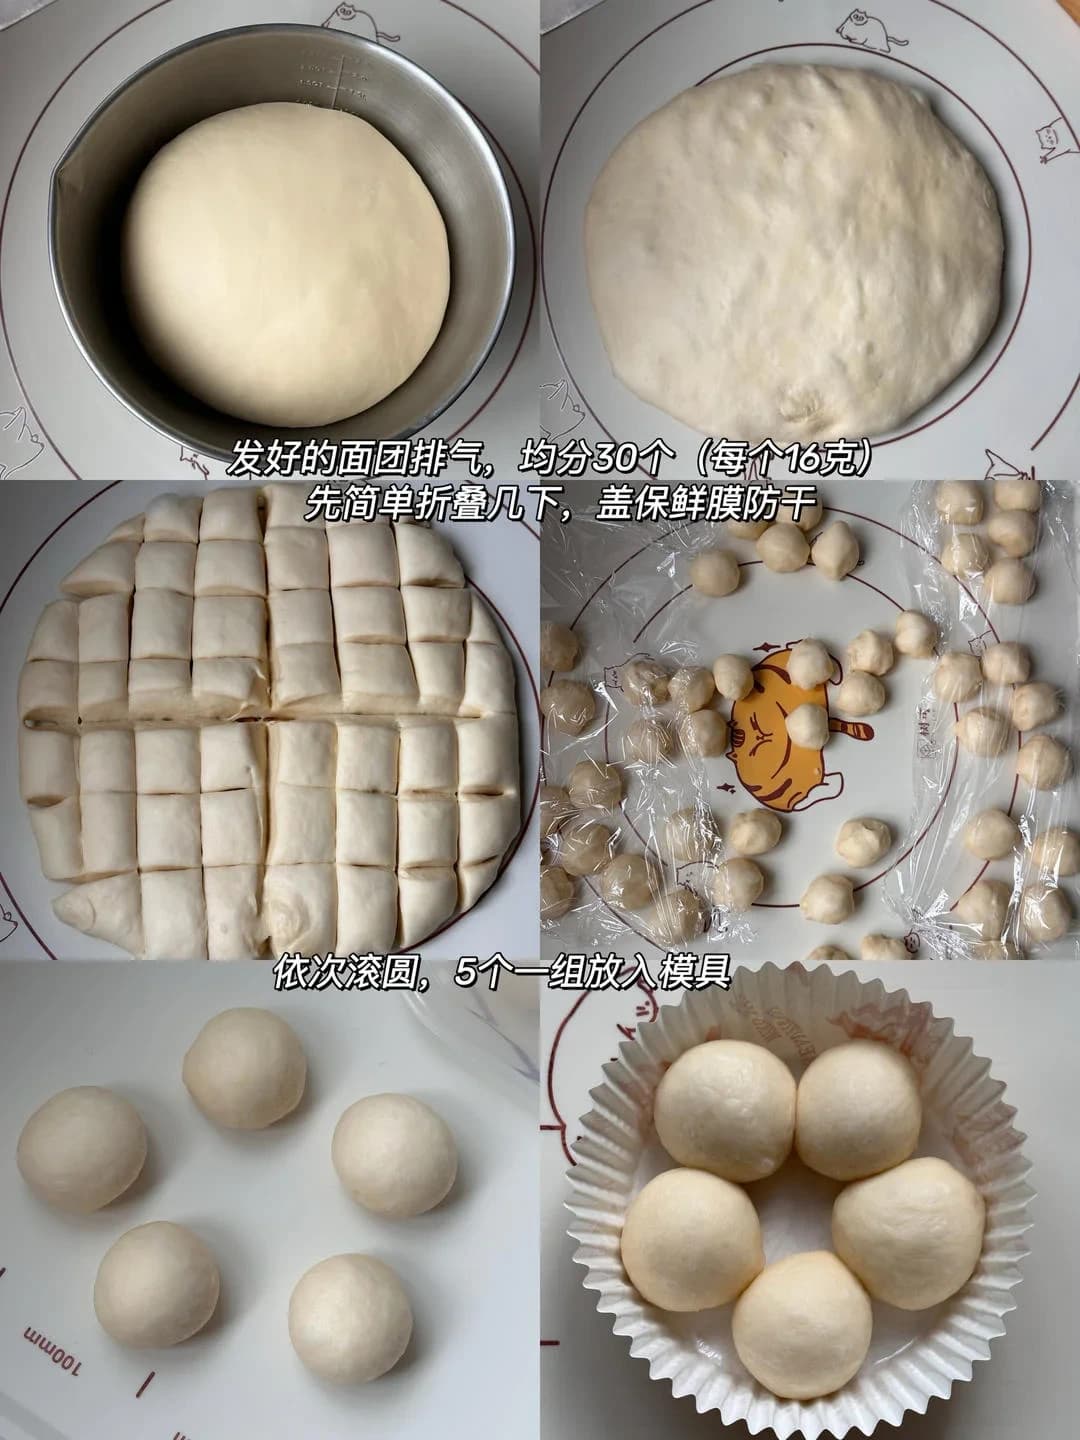
Punch down the proofed dough and divide into 30 equal pieces (about 16g each; the author doubled the recipe and made 12). Fold each piece a few times, cover with plastic wrap to prevent drying, then roll each into a smooth round. Place 5 pieces per group into the mold.
✅ Done when: Punch down the proofed dough and divide into 30 equal pieces (about 16g each; the author doubled the recipe an. Finished: Heat the pan or oil to about 180 C before adding the mixture; the surface should sizzle gently on contact.
Watch out: Weigh each piece instead of eyeballing — uneven portions bake unevenly. Also don't skip the covered rest, or the dough will snap back when you try to round it.
If Buns in the same mold bake to different sizes and doneness:
Use a kitchen scale to divide the dough into equal 16g pieces before rounding
If Dough shrinks back and resists rounding into smooth balls:
Cover the folded pieces with plastic wrap and rest them 10-15 minutes before shaping
- 3
Step 340 min
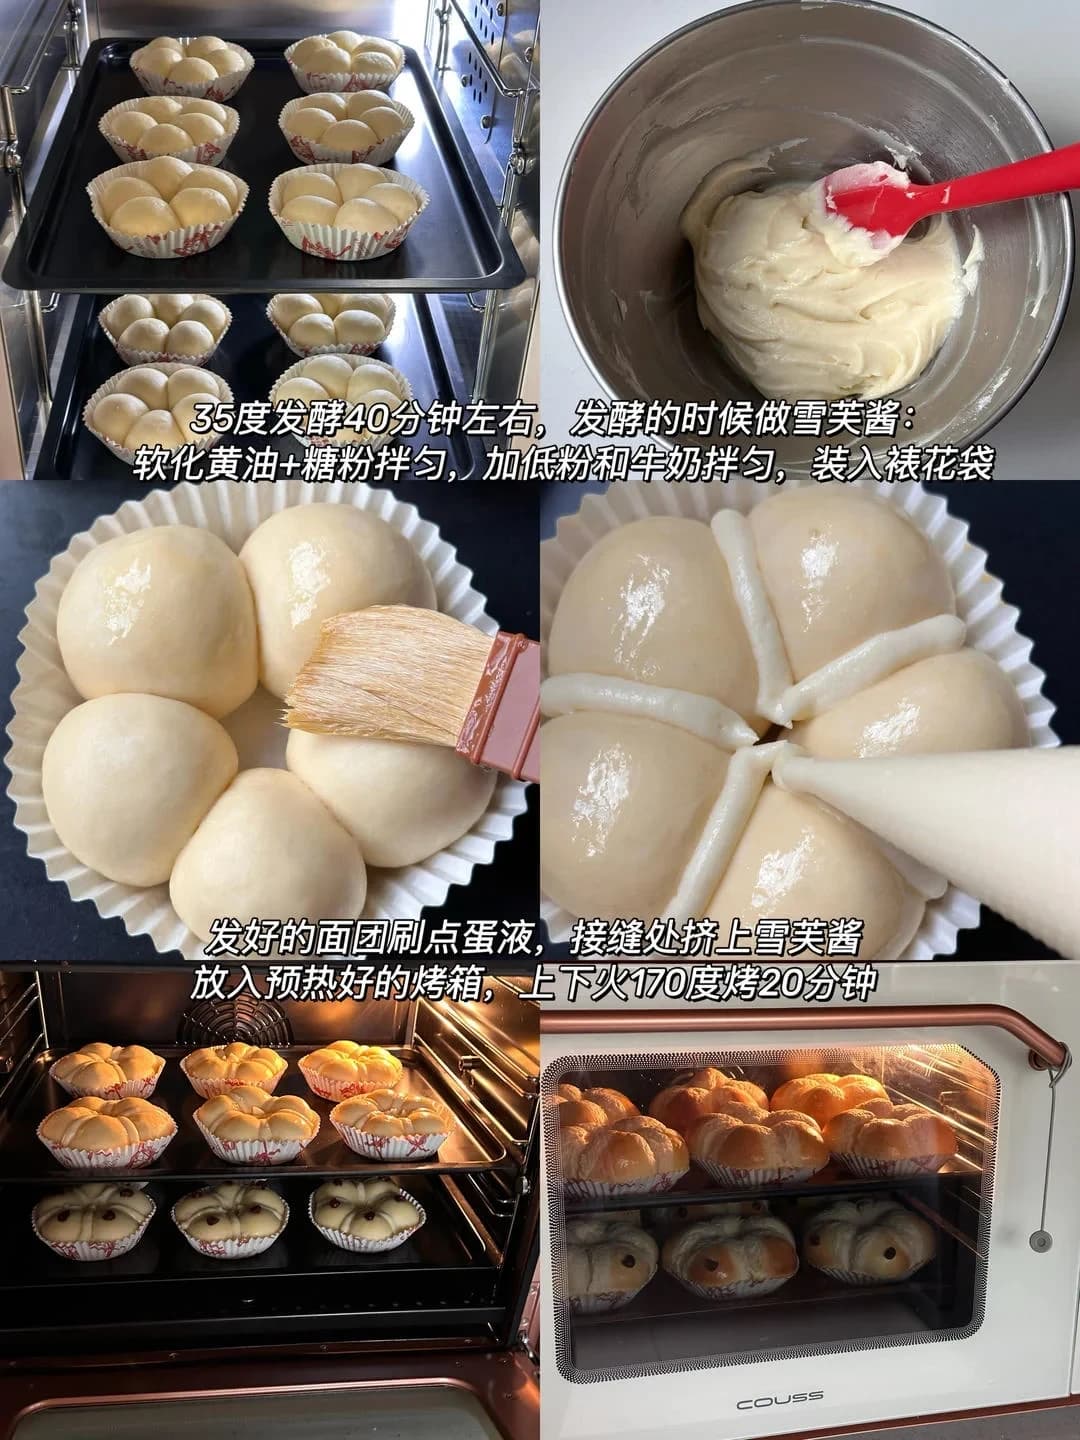
Proof at 35°C for about 40 minutes. While proofing, make the snow velvet paste: cream softened butter with powdered sugar, mix in cake flour and milk until smooth, then transfer to a piping bag. Brush the dough surface with egg wash, pipe the snow velvet paste along the seams. Bake in a preheated oven at 170°C (top and bottom heat) for 20 minutes.
✅ Done when: Proof at 35°C for about 40 minutes. While proofing, make the snow velvet paste: cream softened butter with pow. Finished: Heat the pan or oil to about 180 C before adding the mixture; the surface should sizzle gently on contact.
Watch out: Don't over-proof — dough left too long at 35°C will collapse and the paste will sink into it. Pipe the paste in a thin, even line along the seams; a thick layer won't set properly.
If Dough collapses during proofing and the paste sinks into it:
Watch closely near the end and stop proofing when the dough is puffy and springs back slowly to a gentle poke
If Snow velvet paste cracks, slides off, or stays wet after baking:
Mix the paste until smooth and pipe a thin, even line along the seams
- 4
Step 4
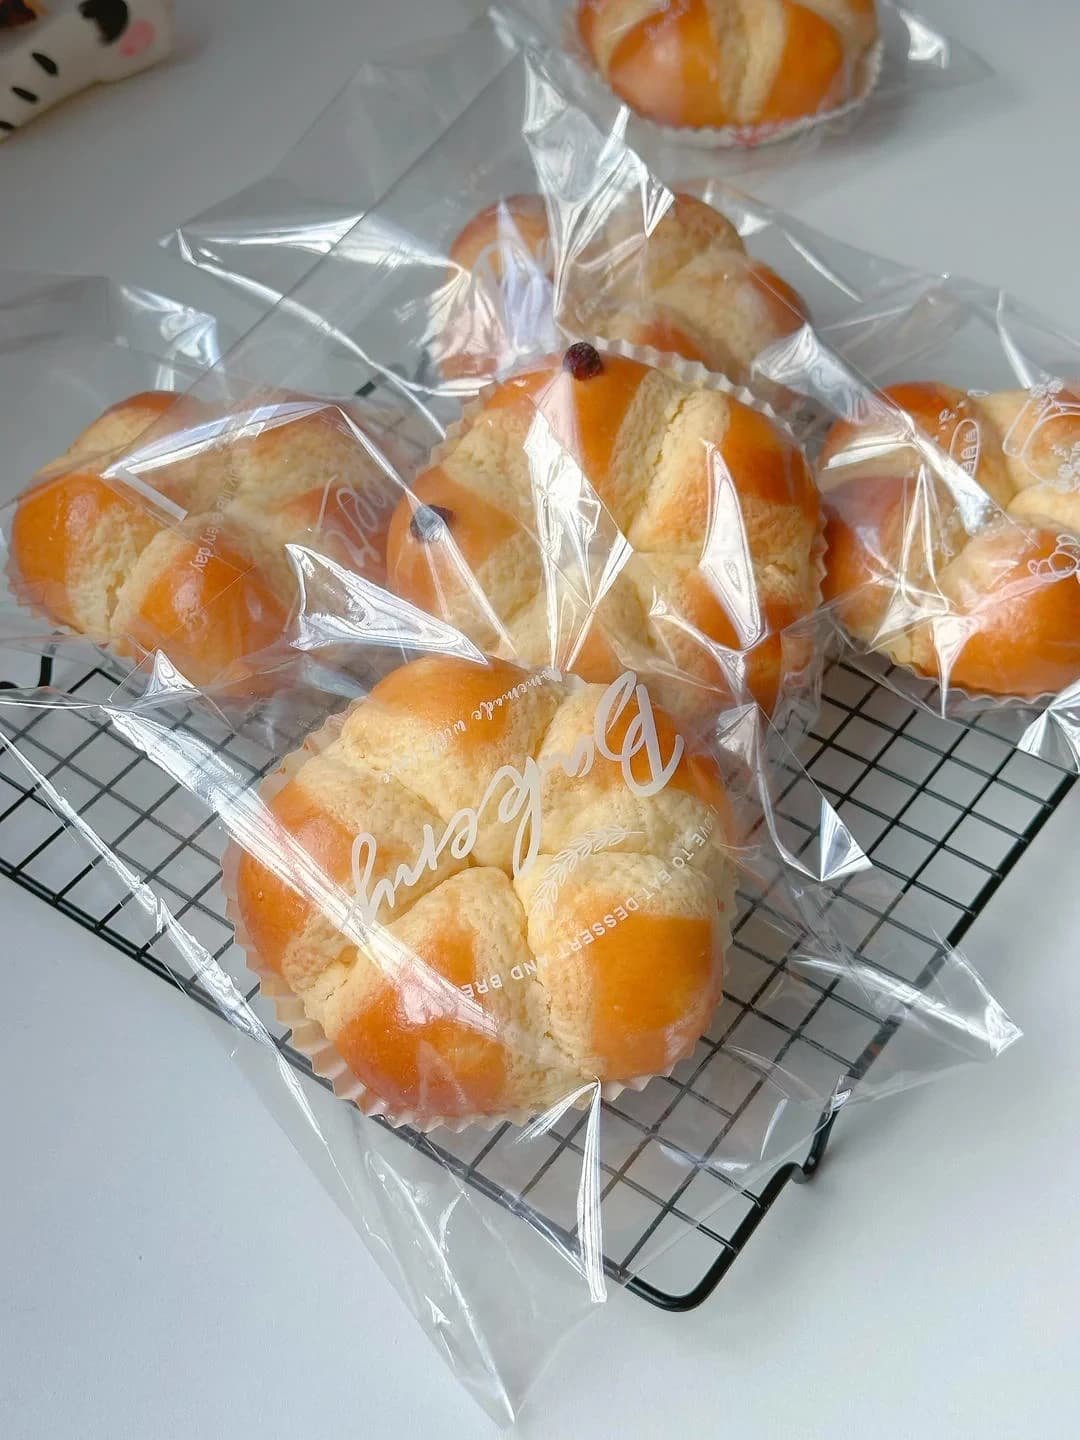
Beautiful and delicious snow velvet flower bread!
✅ Done when: Beautiful and delicious snow velvet flower bread! Finished: Heat the pan or oil to about 180 C before adding the mixture; the surface should sizzle gently on contact.
Watch out: Resist tearing or slicing straight from the oven — hot bread compresses and turns gummy. Cool at least 20 minutes on a wire rack first.
If Crumb turns gummy and dense when the bread is torn or sliced:
Cool the bread at least 20 minutes on a wire rack before serving
If Bottom crust turns soggy and steams:
Transfer the bread to a wire rack right after baking so air circulates underneath
- 5
Step 5
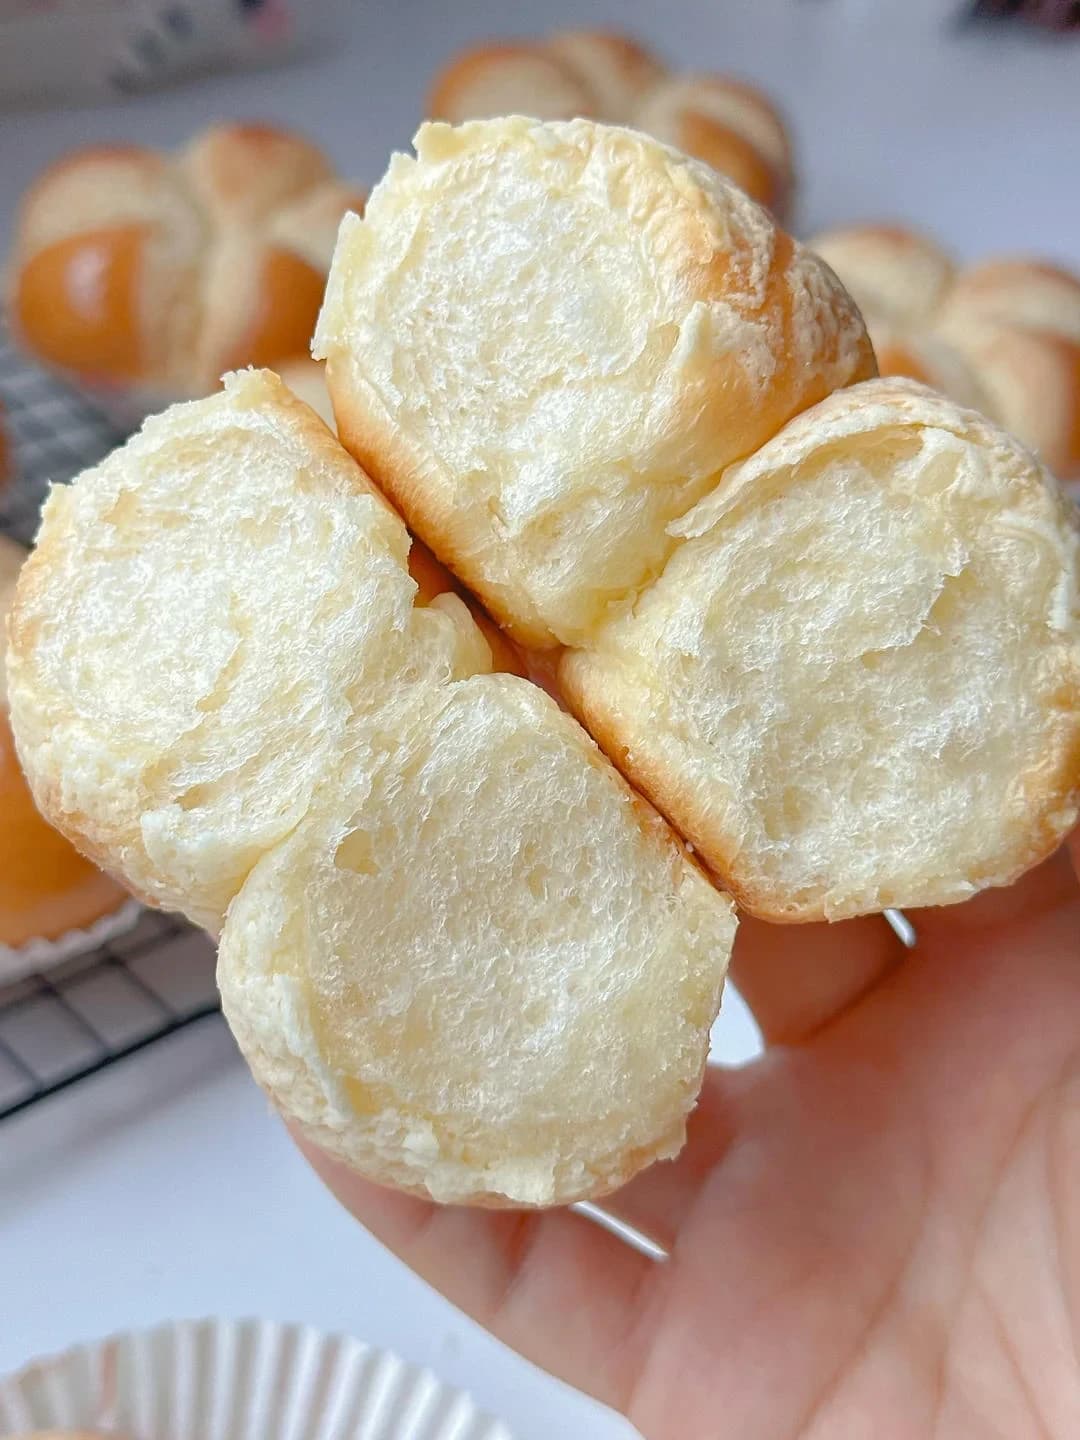
Soft and pull-apart fluffy — kids absolutely love it!
✅ Done when: Soft and pull-apart fluffy — kids absolutely love it! Finished: Heat the pan or oil to about 180 C before adding the mixture; the surface should sizzle gently on contact.
Watch out: Leaving it uncovered dries out that fluffy pull-apart texture fast — bag it airtight once completely cool, and refresh briefly in the oven before serving leftovers.
If Bread loses its fluffy pull-apart texture and dries out by the next day:
Bag the bread airtight once it is completely cool
If Bagged bread turns soggy or molds quickly:
Wait until the bread is fully cool before sealing, and refresh leftovers briefly in a warm oven before serving